Tired of heavy potatoes?

I’ve mentioned several times here that I’m getting overwhelmed by potatoes. They arrive every week in my box and I simply haven’t been able to keep up with them. When it comes to veggies, I am much more drawn to leafy greens, broccoli, cauliflower, and other produce that has a higher moisture content. Does that make sense, do you know what I mean? Potatoes feel heavy to me, not hydrating or refreshing. And the recipes you can make with them are always dense and rich.

I thought some acid might help to brighten things up, so I searched for recipes involving potatoes and tomatoes. In a Chowhound thread someone mentioned a Marcella Hazan recipe that I thought might be just what I was looking for. I veganized it, cooked it up, and it was fantastic. It tasted best after about two days, so it’s definitely a “let the flavors mingle” kind of thing.

I want to give you guys the recipe, but I was too tired to be doing any photoshoots so I have nothing to illustrate it. I dislike putting up posts with no photo at all, so you get this silly one of me from the hotel we stayed at last weekend on Long Island when my cousin was getting married. We arrived after a long day of traveling and all I wanted was a giant pile of broccoli. (See above re: hydrating vegetables.) So the first thing I did was put on my PJs and call room service and ask them if they could send up a giant pile of broccoli. I was thrilled when they agreed, although I didn’t have high expectations, I never do when I’m eating vegetables on the East Coast. Yet what arrived was indeed a giant pile of broccoli goodness, cooked perfectly crisp-tender and dressed with lemon and olive oil with such a light hand I could barely tell the dressing was there, just that the broccoli was some of the most delicious I’d ever eaten. So now you know, if you’re ever at the Hilton on Long Island, order broccoli!

Without further ado, your potato recipe:

Roasted Potatoes with Tomatoes
Veganized and otherwise adapted from a Marcella Hazan recipe found on a Chowhound forum thread

2 pounds potatoes, sliced 1/4 inch thick
2 C onions, thinly sliced
1 28 oz. can of whole tomatoes, torn into small pieces (just the tomatoes, not the juice)
3/4 t. dried oregano
1/2 C water
1/3 C olive oil
Salt & pepper to taste

Preheat oven to 400 degrees.

Mix potatoes, onion, tomatoes, oregano, 1/2 cup water, and salt and pepper.

Put 1 T. olive oil in a large casserole dish and spread it around to coat the bottom and sides of the dish. Put potato mixture into dish and pour in the remaining olive oil.

Roast 1 hour or more on the top shelf of the oven until the potatoes are tender and yummy, turning potatoes every 20 minutes while they roast. Let sit to cool a little, serve warm, not hot. Or better yet, let them sit for at least a day. The flavors just get better and better.

An old nemesis revisited

So I had this eggplant. One medium-sized eggplant. And these zucchini, a whole bunch of them. And I wasn’t cooking them, and every day I’d poke them to see if they had developed the dreaded soft spots that those veggies get shortly before they turn into produce bags full of mush and slime. (Sorry, that’s a pretty gross way to start a food post.) Eggplant I’d normally make into baba ganoush, but if I’m going to wash the food processor I want to be making more than a spoonful; my usual recipe calls for three eggplants and only one had come in my box. Zucchini I’ve been roasting all summer, and it’s been excellent and easy, but I was starting to get a little bored.

So I went online to see what you could make with eggplant and zucchini. And mushrooms. I had this paper bag of mushrooms that I was also anxious to make use of before they left the edible zone. And the internet told me… ratatouille.

Ah, ratatouille. Years of choking you down at Mediterranean restaurants where you were the only vegetarian option on the menu. And these were the eggplant-hating years, even. I look at ratatouille the way soldiers in the field probably look at their MREs. Pure sustenance, nothing more.

Here are the problems I have with ratatouille: 1) It’s bland. It’s basically just a bunch of vegetables, cooked for a long time. Back in Provence in the 19th century or whenever it was invented, I bet that tasted amazing. But modern vegetables just don’t pack that kind of flavor wallop anymore, especially not tomatoes. 2) It’s usually served over couscous or, occasionally, rice. Because it’s bland, it doesn’t sauce up the grain, rather the grain pulls it even further into tastelessness. 3) The eggplant is ALWAYS undercooked, and therefore spongy, bitter, and unpalatable. Undercooked eggplant is the reason I hated eggplant. Now that I understand this I mostly only eat eggplant in three culinary situations: at home, where I control the cook time; in Chinese food, where they fry the heck out of tiny tender eggplants; in Indian food, where they cook the eggplant so long it’s barely recognizable as such by the end (mmm baingan bharta!).

But that got me to thinking. Here I was with eggplant, zucchini, tomato, onion, and mushrooms (I wouldn’t have thought of mushrooms in ratatouille ’til I came across a yummy-looking variant online). I’ve loved eggplant now in many forms when I’ve cooked it at home (click the eggplant tag at the end of this post to see) so who’s to say that being the author of the experience couldn’t transform ratatouille the same way?

Making the ratatouille took a long time because the each of the vegetables was first cooked separately so it could brown rather than steam. I believe the extra time is worthwhile in this case since that’s the very process that is going to transform your vegetables from bland, stewed mush to something more transcendent. It’s also important to me to make the distinction with recipes between difficult and time-consuming. This recipe is incredibly easy, just throw on an apron, turn on an audiobook, and chop and sauté and simmer your way to ratatouille bliss in a few hours.

And bliss it was indeed. This ratatouille was delicious. Deep rich caramelized flavors and a heartbreaking melting texture. I ate it for three meals straight and then I put the last remaining bit into tacos for a some fusion fun. I could go either way on the mushrooms – if I had them on hand I would include them again, but I wouldn’t go out of my way to get them for this recipe, which I think would be excellent without them as well.

I’m linking this recipe up to the weekly What’s In the Box linkup hosted by CSA blogger In Her Chucks. I love contributing my weekly CSA box-contents post to the linkup, but I also love when people post recipes they’ve made using their CSA veggies, so I thought I’d try out doing the same. Do check out the links – there are some seriously yummy things being made out there.

Non-Disgusting, Totally Not Bland Ratatouille (vegan, gluten-free eggplant, tomato, zucchini, onion, mushroom stew)
This is a lightly adapted version of a recipe from The Kitchn, which is definitely worth checking out since it’s a real recipe from a genuine Frenchman, as opposed to my perhaps inauthentic – but delicious! – version. I originally made half a recipe because I only had one eggplant, and it worked out fine, but if I was planning on sharing this yumminess with anyone else I would make a whole recipe’s worth.

2 eggplants
2 yellow onions
6-8 zucchini
1 pound cremini mushrooms
4 large tomatoes
1 1/2 – 2 tablespoons olive oil
3-4 cloves garlic
1 bay leaf
1 T. herbes de Provence, or more to taste
Red wine suitable for cooking, about 1 cup
Chopped fresh parsley (optional)
Salt and pepper

Begin by peeling the eggplants and chopping them into bite-sized cubes. Put them in a strainer set over a bowl (or in the sink) and toss with a tablespoon of salt. Let the eggplant sit while you prepare the rest of the ingredients.

Dice the onions. Warm a teaspoon of olive oil in a large (at least 5 1/2 quart) Dutch oven or pot over medium-high heat. Add the onions and a generous pinch of salt. Sauté until the onions have softened and are just beginning to brown, about 10 minutes.

While the onions are cooking, you can cut up the rest of your vegetables. Keep them separate because you’ll be cooking in batches. chop the zucchini and tomato into bite-sized pieces, slice the mushrooms, and mince (or press) the garlic.
When they have softened and begun to brown, transfer the onions to a large bowl.

At this point The Kitchn offers some helpful advice which I followed liberally, using much red wine: During cooking, a brown glaze will gradually build on the bottom of the pan. If it looks like this glaze is beginning to turn black and burn, turn down the heat to medium. You can also dissolve the glaze between batches by pouring 1/4 cup of water or wine into the pan and scraping up the glaze. Pour the deglazing liquid into the bowl with the vegetables.

So after you move the onions, go ahead and deglaze with 1/4 cup of red wine and then pour that off into the bowl with the onions.

Add another teaspoon of oil to the pot and sauté the zucchini with a generous pinch of salt until the zucchini has softened and is beginning to brown, about 5 minutes. Transfer the zucchini to the bowl with the onions. Deglaze!

Add another teaspoon of oil to the pot and sauté the mushrooms with a generous pinch of salt until they have softened and released their juices, about 10 minutes. Put them in your big veggie bowl. You know the drill – it’s probably time to deglaze!

While the mushrooms are cooking, rinse the eggplant under running water and squeeze the cubes gently with your hands to remove as much moisture as possible.

Warm two teaspoons of oil in the pan and sauté the eggplant until it has softened and has begun to turn translucent, about 10-15 minutes. Don’t skimp on time here. A cube of eggplant should taste edible – maybe not scrumptious, but cooked enough to be edible – before you transfer the eggplant to the bowl with the other vegetables. (You’re about to add the tomatoes, which are acidic, like wine, so they will take care of the deglazing on this step.)

Warm another teaspoon of olive oil in the pan and sauté the garlic until it is fragrant and just starting to turn golden, which will only take a few seconds or a minute at most. Add the tomatoes, bay leaf, and herbes de Provence. As the tomato juices begin to bubble, scrape up the brown glaze on the bottom of the pan.

Add all of the vegetables back into the pan and stir until everything is evenly mixed. Bring the stew to a simmer, then turn down the heat to low. Stirring occasionally, simmer for at least 30 minutes or up to 1 1/2 hours. Shorter cooking time will leave the vegetables in larger, more distinct pieces; longer cooking times will break the vegetables down into a silky stew.

Remove the bay leaf. Stir in some chopped parsley if you like, or sprinkle some over each bowl when you serve it. Enjoy ratatouille alone, as a stew – not as a topping for something else.

The Kitchn says: Leftovers can be refrigerated for a week or frozen for up to three months. Ratatouille is often better the second day, and it can be eaten cold, room temperature, or warmed.

Potato and leek gratin

So. Many. Potatoes. Normally this would be a good thing, but because I can’t seem to find a place in my house to store the darn things without them going bad asap, I need to keep them (along with my onions and garlic) in my fridge. And those babies take up a lot of room. So I’ve been struggling to keep up with the constant summer influx of potatoes. As much as I like potatoes, they differ from other overabundant CSA veggies in one critical way. I can eat an entire bunch of kale or two pounds of zucchini or head of lettuce on my own in a single sitting and feel quite smug about how many servings of my daily vegetable requirement I’ve just downed.

But eating a couple of pounds of potatoes on my own feels over the top. I’m not a huge subscriber to the empty-carbs-evil-carbs perspective, but that many potatoes feels like a giant wallop of glycemic-spiking starchy calories. Much as I learned during my cauliflower revelations, potatoes are probably actually incredibly healthy, especially with the skins still on, but I still prefer to eat them in moderation.

Another thing taking up an absurd amount of room in my fridge was a leek from a few weeks back. This single leek was so long it fit across almost the entire width of my refrigerator! I’m doing a slow-cooker cookbook exploration this week and came across a recipe for a vegan gratin of potatoes. That sounded interesting because it’s a way to use up a ton of potatoes at once but then dole them out slowly as a small side dish, but doing it in a slow cooker seemed unnecessary when I could just make them in the oven. (Making them in the slow cooker does eliminate the need to precook the potatoes, but this recipe is so delicious I think it’s worth the extra step, though I can’t say for sure having never tried the crock pot version.)

So, using the “cheese” sauce from The Vegan Slow Cooker and a Gruyere-filled potato and leek gratin recipe from Vegetarian Cooking for Everyone for inspiration, I whipped up something pretty delicious. It’s a bit bland and quite rich, but I think that’s just what a gratin is intended to be. There are some lovely garlicky notes and thyme is the standout seasoning, which is something I really enjoy.

Vegan Potato and Leek Gratin
With inspiration from The Vegan Slow Cooker and Vegetarian Cooking for Everyone

Cheese sauce:
1 C. cashews, soaked
1 C. nutritional yeast
5 cloves garlic
1 t. sea salt
1.5 C. almond milk

3 lb red potatoes, unpeeled, thinly sliced
1 giant leek or 2 regular leeks, white parts only, thinly sliced into half moons
1 quart almond milk (or more if needed)
2 t. dried thyme or 3 sprigs fresh thyme
3 garlic cloves, thinly sliced
2 t. salt
Fresh grated nutmeg
Fresh ground black pepper
Garlic and vegan butter for the dish

Heat oven to 375. Run a cut clove of garlic thoroughly over the inside of a large gratin dish (this usually refers to an oval casserole dish – you’ll need either a deep one like I used in the photos above or a very large one, 9×12-ish, or you can just use a regular casserole pan – but if you do, beware of spillage in the oven!). Butter generously.

In a large pot combine potatoes, leeks, milk, thyme, garlic, and salt. Make sure potatoes are at least barely covered by the milk. Bring slowly to a boil, then simmer gently until potatoes are barely tender but not falling apart.

While potatoes are simmering, blend sauce ingredients in a blender until smooth.

Drain potatoes RESERVING THE MILK or you can use a slotted spoon to lift out as many as you need at a time.

Put a single layer (roughly, doesn’t have to be perfect) of potatoes in the bottom of the dish. Sprinkle with nutmeg and pepper. Top with some of the cheese sauce. The way I did this was to pour a thick line of cheese sauce from the blender down the middle of the dish and then use a fork to gently push it across all the potatoes. It’s a very thick sauce and easy to spread. Continue layering potatoes, nutmeg & pepper, and cheese sauce until there are no more potatoes. Top with cheese sauce. Take the reserved milk and, carefully pushing the potato mixture away from the wall of the dish, pour in a little bit so it runs down through all the layers. Repeat this on all four sides of the dish. You want the milk to come up to the level of the potatoes, but they will probably be quite wet and saturated already so add in your milk carefully.

(Any leftover milk can be saved as a base for soup. Or you can do what I did – I poured my leftover milk, with potato and leek bits, into the blender that still had residue of my cheese sauce and blended it all together. It turned into a pretty amazing cream of potato soup.)

Bake the gratin in the oven, an hour or more, until a bubbly brown crust forms on top. Let sit for ten minutes and serve warm.

Plum Yum

Many, many plums. That is what I was facing as I began using up perishable food a few days before the weeklong retreat/intensive that begins my school year. I am not a great fan of plums, and even less of pluots. The ones that have been coming in my Full Circle box have been very good, but even still I am not likely to eat 3 or 4 in a day the way I can with nectarines or peaches. So I had about 15 plums and pluots hanging out, looking lovely and ripe but definitely not like they were going to survive for another ten days until I returned from my trip.

In another life, I would have made clafouti. Summer used to be an endless cascade of clafouti, moving through nectarines and cherries and plums as they came into season in turn. However, though there are indeed recipes out there, vegan, gluten-free clafouti is just nasty. So I needed something else to turn my pile of plums into an appealing and easily scarfable treat.

I ended up making a crumble (a crisp? I don’t really know the difference), taking inspiration from Deborah Madison and Jennifer Katzinger of the gluten-free Flying Apron Bakery in Seattle. It was delicious! Sweet enough to be dessert but fruit-focused enough to make a passable (if indulgent) breakfast. I had my auntie over for tea and we enjoyed some Plum Yum and a good chat.

Plum Yum (Vegan, Gluten-Free Plum Crumble or Plum Crisp)

Topping
6 T. Earth Balance, cut into 1/2 inch chunks (Deborah Madison says you can also use 6 T. canola alone or mixed with walnut or hazelnut oil)
1/4 C. brown sugar, packed
2/3 C. sorghum flour (I used sorghum because it was handy, I think rice flour or GF baking mix would work equally well here)
1/2 C. GF rolled oats (or sub the same amount of chopped nuts instead)
1/4 t. salt
1 t. ground cinnamon

Plum filling
3 lbs plums and/or pluots (skin still on), each cut into 6 or 8 slices
1/4 C. maple syrup
1 t. grated orange zest
tiny pinch of ground cloves

Preheat the oven to 375.
In a large bowl, toss the sliced plums with the maple syrup, orange zest, and cloves and set aside.
Using your fingers, work the Earth Balance with the rest of the topping ingredients so that you end up with a coarse, crumbly mixture. You don’t want big chunks of margarine remaining un-crumbled.
Arrange the fruit in a 2-quart gratin dish or sufficiently large casserole (I used a brownie pan) and cover evenly with the topping.
If you’re worried about spillage, set the dish on a sheet pan to catch drips.
Bake until the juices are bubbling and the topping has browned a bit, about 1 hour and 15 minutes. GF topping usually won’t brown as promptly as wheat flour topping, but on the other hand it’s hard to overcook this unless you actually burn it, so use your best judgement – once the plum juice is bubbling, take it out or leave it in til it looks like something you’d want to eat.
Let cool for 10 minutes and serve hot, or serve cold any time. (I recommend breakfast!)

Let’s Turn Up the Heat

It’s summer! I love summer. Summer means gorgeous produce I only get a few months out of the year – corn and tomatoes and peaches and nectarines. Summer means it stays light until late and the days feel like they might go on forever. Summer means bundling up in my warmest scarf and wool socks, turning the oven up to 450, and huddling beside it in my unheated kitchen. Wait, what? Oh, I should have mentioned, this is summer in San Francisco. It is, in fact, colder here in the winter than it is in the summer. But that doesn’t mean it doesn’t get damn cold here ‘twixt May and September.

This has also been a very tired summer for me. Since finishing up my first year of grad school, there has been a distinct increase in bed days and rest days. No problem, that’s what that 450 degree oven is for.

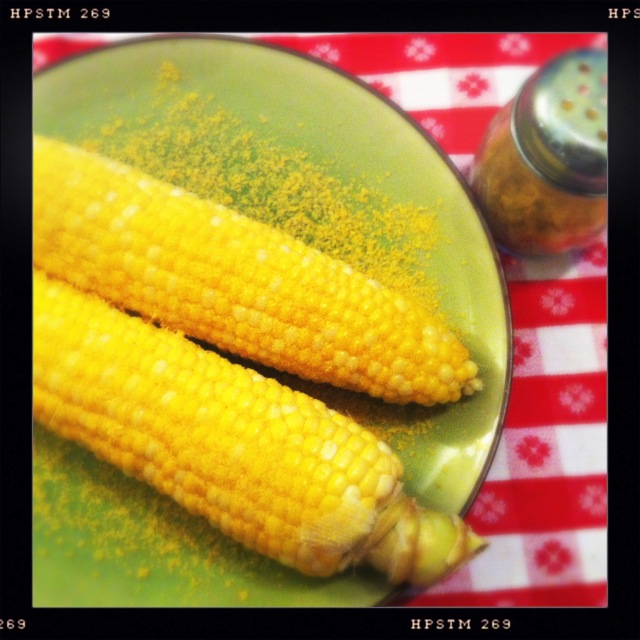
Two ears of corn on a green plate, sprinkled with nutritional yeast, with a shaker of nutritional yeast next to the plate.

It started with the corn. I love corn. My favorite way to eat summer corn is in fresh corn polenta. But that requires me to shave the kernels off the cobs, which involves a bowl and a knife and stuff. Too tired. I could steam it, but I have a bad habit of putting things on to steam and then getting back into bed, having one of my famous memory blips, and coming back far too late to find a scorched, dry pot. Consulting my trusty copy of Vegetarian Cooking for Everyone (love that “what do I do with this vegetable?” section in the middle!), I learned that corn can be roasted. IN THE HUSK. Here are the steps: Turn oven to 450 degrees. Take corn ears out of CSA box. Lay corn ears onto oven rack. Come back in 15 minutes (give or take, if you space out it’s cool, they are far from burning). Give a little tug and all the husk and silk come gently off at once. WOW.

Two ears of corn sprinkled with nutritional yeast, with a grey cat sniffing at them while standing on a red and white checked tablecloth

As an experiment I tried sprinkling it with nutritional yeast. It was pretty great. And I wasn’t the only one thought so! Miss Violet went absolutely bananas. She’s usually pretty good about not being on the table. She might jump up to check something out, but if I say her name or give her tail a little whack she’ll jump down right away. She knows she’s not supposed to be up there. But this time I had to forcibly remove her, picking her up off the table, with her struggling the whole time to get back to the nutritional yeast-covered corn. A little internet research seems to indicate it’s okay for cats to have (or very good for them, depending on the source) so Miss Smushyface was ultimately distracted with a little saucer of her own so I could eat my corn in peace.

A white bowl with chunks of zucchini, roasted and thickly sprinkled with herbs.

I had such a good time with the corn that I tried some zucchini next. My favorite way to eat summer zucchini is Pan-Seared Summer Squash with Garlic and Mint but that requires slicing the zucchini thinly, searing it a few pieces at a time in a pan, flipping and searing more, then repeating until all the slices have been cooked. Mint must be chopped, lemons must be squeezed, garlic must be minced. My new method: Chop zucchini into chunks. Toss with a teaspoon of olive oil, salt, pepper, and herbes de Provence. Put in a parchment-lined baking dish (or rimmed baking sheet) for ~45 minutes or until your desired texture. WOW.

I also tried this with some russet potatoes and cauliflower that came in my box. I don’t have a picture because we ate it too fast. Disher said it was one of the best things he’d ever put in his mouth. I have to concur. Roasted cauliflower is amazing.

So I have my new summer formula. And as an added bonus, it helps keep the house warm on those foggy damp summer nights.

Summer Roast Corn

Fresh corn, still in its husk

Preheat oven to 450. When oven is heated, lay corn on oven rack. Let roast for 15 minutes. Remove corn and, using some sort of heat protection on your hands, pull away the husk. All the silk and husk will just slide right off. Sprinkle with nutritional yeast if desired.

Summer Roast Zucchini

Fresh summer zucchini

Preheat oven to 450. Cut each zucchini lengthwise down the middle, then cut across into 1-inch chunks. Toss with a little olive oil (I use a 1 1/2 teaspoons for 4 zucchini), salt, pepper, and herbes de Provence. Line a baking sheet with parchment. Roast zucchini 45 minutes to an hour, or until meltingly tender and browned.

Summer Roast Potatoes and Cauliflower

Potatoes (I’ve tried Russets and Yellow Finn)
Cauliflower

Preheat oven to 450. Cut veggies into small pieces. Cauliflower florets around 1 inch, potatoes around 1/2 inch. Line a baking sheet with parchment. Roast veggies 45 minutes to an hour, or longer, or until tender and browned.

Green Onions and Red Kale ~ Week of July 11th

A large rectangle formed from colorful fruits, vegetables & mushrooms, shot from above against a backdrop of red and white checked tablecloth.

So yeah, I’m a full week behind in posting my box contents. I blame grad school. I know it’s currently summer, but for the next two years that’s my story and I’m sticking to it. Last week’s box was another beauty. My blog friend Tammy of Agrigirl commented on a previous box that it’s unusual for a CSA box to contain mushrooms, and I agree. It’s a wonderful, much appreciated treat and at the same time it reinforces my discomfort at Full Circle not being a “real” CSA. In next week’s (er, this week’s) post I’ll share some of  my pros and cons so far for Full Circle, and this “where the heck is this all coming from?” feeling (which I associate with magically getting mushrooms in my box) is definitely one that I’ve been musing on.

What came in my box:
Zucchini – 3
Cucumbers – 2
Cremini Mushrooms – 0.66 lb
Garlic – 5 bulbs
Bi-color Sweet Corn – 4 ears
Green Onions – 1 bunch
Russet Potatoes – 3
Red Kale – 1 bunch
Nectarines – 4
Apricots – 6
Peaches – 3
Strawberries – 1 pint

My substitutions this week were legion: Garlic instead of green bell peppers, Russet potatoes instead of romaine, red kale instead of rainbow chard, nectarines instead of Red Raven plums.

Since I’ve already eaten everything from my box I can tell you what I did with everything. I’m super into roasting right now (expect a post if I can ever get caught up!) and roasted the zucchini, corn, and potatoes. The cucumbers went into cucumber sunomono (for which I really need to post my recipe since I don’t quite love any of the ones I come across online) to accompany a tired-day treat-myself order of sushi delivery. The mushrooms and some of the garlic made for a delicious Mushroom and White Bean Paprikas (an Appetite for Destruction recipe) served over Caulipots (also AfD) made from the previous week’s cauliflower and potatoes. One of the green onions went into ramen (Thai Kitchen rice noodle ramen is soooo cheap and filling!) with some leftover roasted corn and a baby bok choy that had been overlooked from the previous week. Most of the fruit was eaten for breakfasts and snacks, however one of the apricots and a few of the nectarines went into a green smoothie with the kale.

I still have onions and garlic, which is at it should be, and also some chard and two partially eaten heads of lettuce which, looking at this list, I realize now are from an even earlier box. But other than that I’ve been very proud of how efficiently and deliciously I’ve taken care of my box contents! It’s a little amusing (bemusing?) to realize that the Harvest box is marketed towards families of 3-6 people and claims to contain 45-55 servings. I do occasionally share with others, so I probably average out to a family of about 1.3. I like the math, though, which indicates I’m getting around 6 servings of fruits & veggies a day. All right!

The Bowl System

I love systems. I’m super attracted to listmaking, organizing, and planning. I get this awesome feeling when I pull together a bunch of disparate pieces into a greater whole, when I create a system that makes life easier than the sum of its parts. (All of which probably explains why creating corporate systems & writing training manuals for them is one of the things I’ve done professionally.)

So let me introduce you to my latest system, The Bowl System. It’s like meal planning broken down into its component parts which can then be fit back together in all kinds of interesting ways. The Bowl System was created to address several issues. The first is my ever-present need for energy management. I have days when I’m too fatigued to be out of bed long enough to cook a meal. I can usually manage to heat a can of soup or put an Amy’s in the toaster oven, but doing that too often starts to make my rest days feel extra punitive. My body needs fresh food, and my soul needs deliciousness.

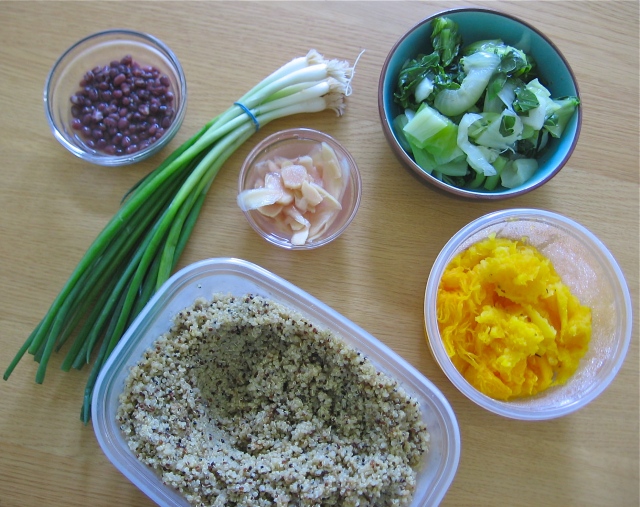
A birds-eye view of prepared quinoa, squash, bok choy, green onions, azuki beans, and pickled ginger, each in its own dish.

Quinoa, baked squash, steamed baby bok choy, pickled ginger, green onions, and adzuki beans.

The second issue is that, I don’t know if you’ve noticed, but I’m kind of a foodie. I cook really elaborate meals. I spend two hours on an average weeknight dinner. I like meals with a wide variety of flavors and textures and colors. My palate also gets bored relatively quickly. Monday’s giant pot of some amazing culinary concoction has been reduced to eat-for-fuel status by the time it becomes Thursday leftovers. But it’s just not realistic for me to prepare a different elaborate meal every night. Not just because I get too tired, but also because I want to have a life. I can’t count the number of times I’ve had to choose between going out/social plans and the meal I had planned for that night.

Third, I need a system that can adjust to my ever-shifting financial state. Well, my financial state remains fairly consistently at just above dismal, but the amount of guilt I feel for spending money on food is ever-shifting. This calls for a plan that can be equally at home with local seasonal bounty from the CSA box or farmer’s market and with bargain not-particularly-in-season produce from dirt-cheap FoodsCo.

A bowl of quinoa surrounded by dishes of steamed cauliflower, roasted mushrooms, roasted new potatoes, roasted zucchini with herbs, and tempeh-bean sausage crumbles
Quinoa, roasted mushrooms, steamed cauliflower, roasted potatoes with rosemary, roasted zucchini with herbes de Provence, tempeh-white bean sausage crumbles

My fourth need was one that is fairly unusual for me. Since there’s not much I can eat besides fruits, vegetables, legumes, and whole grains, I tend not to worry about fat or calories or stuff like that. But I’ve been going through a lot of olive oil lately. Way more bottles than usual. Where is all that oil going? Into me, that’s where it’s going! A tablespoon for sautéeing garlic, a tablespoon in the marinade for the tofu, more oil for the pan to broil the tofu, a few tablespoons sprinkled over the veggies before they go in to roast, another tablespoon (or more) in the salad dressing. That’s a lot of olive oil. Which is not exactly the devil, but it is more fat than I would prefer to be eating in such a quantity.

So many different pieces to juggle. Enter The Bowl System.

The bare bones of the Bowl System go thusly: Pick a day to be your Cooking Day. Make a large quantity of a grain or two which will serve as the base to your bowl. Get a bunch of produce (preferably in season) and prepare it very simply. Select a few different protein sources. Pick 3-6 different sauces/dressings/marinades that you enjoy and make a single recipe of each one. At mealtime, pull out your grain. Top it or mix it with a selection of your veggies and one of your proteins (if you need big protein in that particular meal). Pick a sauce that fits the flavors you’re looking for, drizzle that over your bowl, and then garnish and eat. Easy peasy to have a fresh, varied, delicious, filling meal every day for a week.

A bowl filled with quinoa, lettuce, sprouts, edamame, and smoked tofu with an orange-colored dressing, sprinkled with nori and sesame seeds.

Quinoa, romaine, broccoli sprouts, edamame, and smoked tofu with carrot-ginger dressing, garnished with shredded nori and sesame seeds

In a little more detail: Your grain could be quinoa, or rice, or buckwheat, or millet, etc.  I like stuff I can make in the rice cooker, since that requires very little participation on my part and can happen in the background while I’m prepping everything else. For the veggies, I like to get an assortment that usually includes a salad green, a dark leafy green, an orange veggie (like sweet potato or squash), a starch (like potatoes) and then whatever else appeals. I experimented with getting my veggies at Trader Joe’s where they’re already washed and cut up; it was a big savings on time and energy but the amount of packaging made me sick to my stomach, so I’m back to chopping my own. “Simply prepared” means leaving your veggies raw, steaming, roasting or baking them, no fancy business. Sprinkle on some herbs before you roast if you like, but no chopping garlic or onions, no sautéeing (which requires standing over the stove for a long period of time), no toasting whole spices and grinding them… you get the drift. Chopping your produce should be the lengthiest part of this whole operation.

Protein sources can include smoked tofu, lentils, all different kinds of beans (black, pinto, adzuki, cannellini, black eyed peas, butter beans, kidney beans, edamame…), and seeds like pumpkin and sunflower. Nuts are also a great source of protein, but I tend to use them in smaller quantities as a garnish. I got super fancy one time and made tempeh-white bean sausage crumbles, but I don’t think it was worth the extra effort in the end.

Six jars filled with different colored sauces and dressings, viewed from above.

Okay, so you’ve stocked your fridge with grains, prepped veggies, and have your packets of marinated tofu and your cans of beans at the ready. You mix them all up in a bowl and… it’s not exactly a meal yet, is it? That’s where the sauces come in. The sauces are key. For example, I dislike beans straight out of the can. And cold beans out of the can? Absurd! But taco salad, with black beans and rice and lettuce and tomato and corn, all mushed together with some yummy salsa and a squeeze of lime? That’s delicious.

Because I’m trying to pay attention to my oil consumption, I’ve been loving making sauces and dressings from Isa Chandra-Moscowitz’s fabulous low-fat vegan cookbook Appetite for Reduction. I am particularly partial to her Green Goddess, Peanut-Lime, and Caesar Chavez. These are all easy to make, and mostly just involve the blender. I’ve also used the dressing from my Cafe Gratitude-style ricebowl hack, kale sauce, baba ganoush, goma miso dressing, delicious tahini sauce, and of course salsa straight from the jar. I’m sure there are many other fantastic options; if you have any go-to sauces or dressings that are relatively quick and easy to put together, let me know in the comments!

The sauce makes a bowl of stuff into a meal, but it’s the garnishes that make it into a fancy meal! I like to go wild with the garnishes, which is easy to do because usually they take the least effort to prepare (if any prep is needed at all). Garnish ideas: Avocado, sprouts, green onions, pickled ginger, olives, fresh herbs like parsley, cilantro, and mint, seeds (sesame, pumpkin, sunflower, chia), nuts (cashew, almond, pistachio, walnut – though I would toast walnuts first), shredded nori, a drizzle of toasted sesame oil or flax oil.

A bowl stuffed with artfully arranged sweet potato, avocado, broccoli, radishes, and broiled tofu, sprinkled with cashews, pumpkin seeds and sunflower seeds.

So what was so revolutionary for me about The Bowl System, you may be asking yourself? Vegans and hippies and all kinds of people have been eating the “bowl” style meal for ages. It’s true, and I love bowls. I was always putting them on my menu plans, but I rarely actually made them. Take a look at the bowl above. I made it before the Bowl System. The idea at that time was that on the night I wanted to eat the bowl, I would cook a grain. Then I would top it with whatever wonderful leftover veggies and proteins I had in the fridge, then garnish it with nuts and seeds and so on, then whip up a dressing and pour it on. Only trouble was, I almost never have leftover veggies. I’m an eat-the-whole-head-of-broccoli-because-why-not? kind of girl. The night I made this bowl the broiled tofu was left over from another meal, but I had to make the rice, steam the sweet potatoes, steam the broccoli, then prep the garnishes, and then finally make a dressing. That’s a lot of work for something that worked out to be, the way I was doing it with my meal plan, one or two meals at most. With The Bowl System I spend maybe twice as much time on my Cooking Day as I did preparing this bowl, but when I’m done I have the makings of delicious and varied meals for a week.

This is a long post and it took a long time to write, and now I’m tired. So, I hope you enjoyed it and [insert snappy ending here!]

Bestest baba ganoush

New roommate, new relationship, new school. There has been so much going on in the last few months! I’m so behind on blogging all the deliciousness I’ve been cooking and creating, and, ironically, my commitment to cooking at home as much as possible has been part of the reason I haven’t had the energy to blog.

But as I’ve discussed in the past, part of the reason I lag on blogging sometimes is because I seem incapable of writing a post without making it a ten paragraph magnum opus. My life has been so incredibly busy I keep having the sense that I “don’t have time to blog,” which is only true if I let it be true. I keep taking pictures of food, I’ve mostly stopped doing any kind of post-processing on my photos and just throw ’em up as is, and if I keep my verbosity to a minimum the whole process shouldn’t take hours, the way it sometimes does. The way it often does. But that’s all in the past now. Maybe. At any rate, the intention of this blog is to serve as a resource for people who want to know what to cook with their CSA veggies and for people who want to know more about vegan, gluten-free cooking. I’d like to find ways to continue to do that, even amidst starting grad school, an overwhelmingly busy social life, and multiple other projects.

Falafel with homemade GF pita, baba ganoush, and turnip pickles

So today, as my reentry to the magical land of food blogging, I bring you the best baba ganoush ever. The baba this recipe produces is in a whole ‘nother category from store-bought baba. I think the two main distinguishing features are the texture, which is smoother and more fluid than the paste-like version one often finds in commercial baba, and the unparalleled smokiness. If you’ve never had homemade baba (and you’re not one of those people who can’t stand smoky flavor) this stuff is going to blow you away! I make it as often as I can (hurray for eggplant season!) and it’s incredibly gratifying to whip up a huge tub of the same spread that costs $4 for a tiny 8oz container.

The recipe I use is a David Lebovitz recipe, and I make it exactly according to his specifications and love it, but I do have a few notes. Normally in this case I would reprint the recipe here (with proper attribution and link) so that my notes and the recipe would be in one place (I find recipe notes tend to get lost if they’re on a different blog than the recipe I’m using) but David is very stern about wanting to be asked first, and that kind of time spent is what I’m trying to avoid right now in my new, keep-on-blogging regime. Plus his commentary in the post is quite witty and fun, so it’s good that you’ll get to enjoy that as well.

So, the Baba Ganoush recipe can be found here, on David Lebovitz’s blog. My notes are as follows: Like David, I also like my baba ganoush super smoky, and tend to char my eggplants on the gas flame until they are quite black all over. (Tongs are very helpful for holding the eggplants at the more awkward angles needed to char the bottom and top.) Unlike David, I don’t put cumin in my baba (this is optional in his recipe). I’ve never tried it, but it doesn’t sound good to my mouth. My final note is that sometimes I add considerably more lemon juice. I’m not sure if the other ingredients change in ways that demand more acid in the mix, or if my tastes are simply different from day to day. But I would start with the 3 tablespoons called for in the recipe and then after that add it to taste.

Through the grace of pickles

I’ve been sick twice in the past month. Boo! Always sore throat, achey body, congested nose type stuff. The sore throat has been predominant. You know that feeling when you’re totally dehydrated but it hurts too much to drink water? Or when your whole body just feels parched? Or when you’re hungry, but the idea of eating food is physically repulsive?

Yeah, all that good stuff. For some reason the one thing I could stand to eat during my bouts of illness was pickled vegetables. Lucky for me, I’d just made big batches of pickled mushrooms and carrots, and then a friend brought over a jar of amazing pickled daikon. It was like a pickle party every night, and through the grace of pickles I recovered my health and was able to return to normal functioning once again.

The friend who made the amazing daikon pickles is currently riding a bike 600 miles from SF to LA to raise money for the fight against AIDS. (Awesome!) So I’ll have to get that recipe to you later. I’m thinking I may have to engineer a whole series of guest posts from him, since he also just invented what is pretty much the best vegan, gluten-free cracker ever in the history of crackers. (As a side note: Am I weird for experiencing this feeling of absolute bliss that my life has turned out such that I have friends who bring me jars of homemade pickles?)

My own recent adventures in pickling started when I had a bunch of mushrooms left after making a delicious lentil, millet, and mushroom loaf. I never buy mushrooms because they’re pricey and they don’t keep well, but here I was with a large quantity of them to spare. I rushed to my recipe files – it seems like there are always mushroom dishes I have to pass up – but ultimately realized that what I really, truly wanted was Russian-style pickled mushrooms. (Some part of me must have already known I was getting sick!)

I Food Blog Search‘d and found a wonderful blog about Russian cooking called Yulinka Cooks. The author has been on an entire odyssey of mushroom pickling in an attempt to find a recipe she likes. I went with the recipe that has met with the most approval so far, though her quest seems by no means over. My feeling after making the recipe myself was that it nails the texture perfectly (which is actually the thing I was craving) but the clove flavor is way too dominant for me. So I’ve modified the recipe to be much less clovalicious. Your mileage, as they say here on the interwebs, may vary.

I had a good bit of extra brine left after I pickled my mushrooms, so I dumped in a whole bunch more sugar and white vinegar, chopped some carrots into sticks (using these Smitten Kitchen carrot pickles for inspiration) and pickled those as well. They came out crunchy and delicious. Next time I’ll try the Smitten Kitchen pickling liquid, which uses dill seeds. Fun!

Russian Pickled Mushrooms
This recipe is adapted from one found at Yulinka Cooks, which was adapted from a Russia! magazine recipe. The texture of these will be firm yet supple, just how I like my mushroom pickles!

1 pound button mushrooms
2 small garlic cloves, peeled and thickly sliced
handful black peppercorns
2 whole cloves
2-3 bay leaves
1 T. salt
1.5 T. white vinegar
1 t. sugar
1.5 C. water

Wash the mushrooms and slice in half. Place in a pot or large pan, cover with water, bring to a boil. Simmer for 20 minutes.

Reserving the liquid, drain the mushrooms. You can either use the liquid in place of the water in the pickles, or save it for mushroom stock.

Transfer the mushrooms to a clean glass jar. Toss in the sliced garlic cloves as well.

In a small saucepan, combine the peppercorns, cloves, bay leaves, salt, sugar, vinegar and water or mushroom stock. Bring to a boil. Pour over the mushrooms in the jar.

Let sit at room temperature for a few hours. Taste the liquid and adjust the seasonings. Then transfer the jar to the fridge and let the mushrooms marinate at least 48 hours. Mushrooms will keep, tightly covered in the fridge, for at least a week.

A very kaleful vegan, gluten-free Menu Plan Monday

Too tired to say anything interesting! It’s been a crazy couple of weeks. I have an awesome new roommate. More on him later. Sorry I haven’t posted. Here’s my menu for the week. (Hopefully all this kale will restore my energy.)

Gluten-free Menu Swap this week has the theme Simple Meals, hosted by Cheryl at Gluten Free Goodness. Lots more meal plans at OrgJunkie. Yay!

Thai yellow curry

Monday
Tunaless casserole (add frozen peas)
Raw kale salad with raw corn, avocado, and basil

Tuesday
Thai yellow curry with tofu, potatoes, basil, cabbage, and Chinese broccoli
Thai cucumber salad
Brown basmati rice

Wednesday
T’s bday dinner, menu TBD

Thursday
Red lentils & kale with coconut, spring onions, and crispy shallots

Friday (soak 1/2 cup cashews in advance)
Kale with millet and tahini sauce (I lightly steam the kale first)
Crash hot potatoes

Saturday
Roasted sweet potato and lentil salad
Farmer’s market vegetable side

Sunday
TBD based on farmer’s market

Shopping list, store: 1 cup tvp, 1 tsp dulse flakes, 1 bunch kale, 1 ear corn, 2 yellow potatoes, tofu, Chinese broccoli, 2 cucumbers, 1 lg shallot, 1 cup spinach

Shopping list, farmer’s market: 2 bunches kale, 3 spring onions, 1 lb small red new potatoes, 2 sweet potatoes, veggie for side dish, veggies for Sunday’s meal